OctoPrint es un sofware creado por Gina Häußge y es 100% opensource con un interfaz amigable que hace de servidor de impresion 3D permitiendo controlar en la practica cualquier impresora 3D a distancia.
Gracias a este sw podríamos dejar nuestra impresora imprimiendo durante horas mientras la controlamos desde cualquier parte del mundo ( se puede empezar, parar y pausar impresiones en tiempo real) o la monitorizamos gracias a que podemos conectarle una webcam y hacer streaming de las impresiones e incluso timelapses.
Otras utilidad sin duda interesante es subir o visualizar nuestros GCODES e incluso generarlos !las posibildades son casi infinitas!.
Este sw esta en constante desarrollo y mantiene una gran comunidad en Github que comparte e innova en sus nuevas implementaciones de acorde a las necesidade de cada usuario,
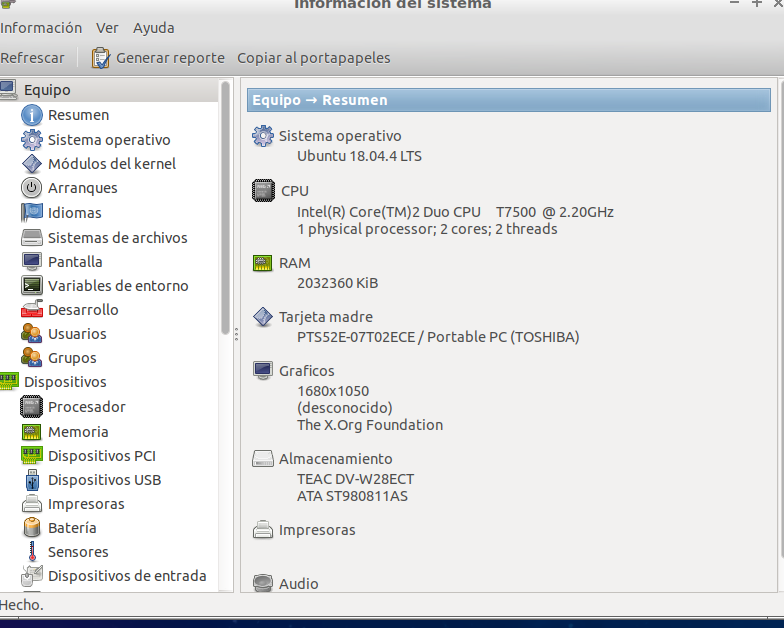
Sin duda la forma más sencilla de instalar OctoPrint es usando una Raspberry o a orangePi como vimos en este port, R pero también es posible instalarlo en cualquier ordenador con windows y como vamos a ver con Linux
Las instrucciones de configuración genéricas se reducen a Instalación de Python incluyendo pip y virtualenv, pero tenga en cuenta:
-
-
- Si bien OctoPrint es compatible con Python 3.7+ a partir de la versión 1.4.0, muchos de los complementos disponibles siguen siendo solo validos para Python 2.
- Si desea hacer uso de complementos del repositorio de complementos, por ahora aún debe instalar OctoPrint en Python 2.7. Tenga en cuenta que la migración a Python 3 en una fecha posterior se realiza fácilmente.
-
En resumen estos son los pasos :
-
-
- Crear un entorno virtual en algún lugar:
-
virtualenv OctoPrint
-
-
- Instalación de OctoPrint en ese entorno virtual:
-
OctoPrint / bin / pip install OctoPrint
-
-
- Luego, OctoPrint se puede iniciar a través de ./OctoPrint/bin/octoprint serve o con una ruta absoluta / ruta / a / OctoPrint / bin / octoprint serve
- Las instrucciones de configuración más específicas para los entornos de tiempo de ejecución más comunes se pueden encontrar a continuación.
-
![]()
Configuración básica
Para el paquete básico, necesitará Python 2.7 (debe instalarse de manera predeterminada) y pip.
Las dependencias de OctoPrint serán instaladas por pip:
cd ~
sudo apt update
sudo apt install python-pip python-dev python-setuptools python-virtualenv git libyaml-dev build-essential
mkdir OctoPrint && cd OctoPrint
virtualenv venv
source venv/bin/activate
pip install pip --upgrade
pip install octoprint
Si esto instala una versión anterior de OctoPrint, pip probablemente todavía tenga algo en caché. En ese caso, agregue –no-cache-dir al comando de instalación, p.
pip install --no-cache-dir octoprint
Para hacer esto permanente, limpie el caché de pip:
rm -r ~ / .cache / pip
Es posible que deba agregar el usuario pi al grupo de marcado y tty para que el usuario pueda acceder a los puertos seriales:
sudo usermod -a -G tty usuario
sudo usermod -a -G dialout usuario
Entonces debería poder iniciar el servidor OctoPrint:
~ / OctoPrint / venv / bin / octoprint serve
Lo cual responderá algo como esto:
octoprint serve
2020-04-21 16:30:41,253 - octoprint.startup - INFO - ******************************************************************************
2020-04-21 16:30:41,254 - octoprint.startup - INFO - Starting OctoPrint 1.4.0
2020-04-21 16:30:41,254 - octoprint.startup - INFO - ******************************************************************************
2020-04-21 16:30:41,275 - octoprint.plugin.core - INFO - Loading plugins from /home/soloelectronicos/OctoPrint/venv/lib/python2.7/site-packages/octoprint/plugins, /home/soloelectronicos/.octoprint/plugins and installed plugin packages...
2020-04-21 16:30:41,799 - octoprint.plugin.core - INFO - Plugin Pi Support Plugin did not pass check, not loading.
2020-04-21 16:30:41,869 - octoprint.plugins.octoprint.plugins.discovery - INFO - pybonjour is not installed, Zeroconf Discovery won't be available
2020-04-21 16:30:41,877 - octoprint.plugin.core - INFO - Found 14 plugin(s) providing 14 mixin implementations, 25 hook handlers
2020-04-21 16:30:41,911 - octoprint.server.heartbeat - INFO - Starting server heartbeat, 900.0s interval
2020-04-21 16:30:41,941 - octoprint.server - INFO - Intermediary server started
2020-04-21 16:30:41,941 - octoprint.plugin.core - INFO - Loading plugins from /home/soloelectronicos/OctoPrint/venv/lib/python2.7/site-packages/octoprint/plugins, /home/soloelectronicos/.octoprint/plugins and installed plugin packages...
2020-04-21 16:30:41,950 - octoprint.plugin.core - INFO - Plugin Pi Support Plugin did not pass check, not loading.
2020-04-21 16:30:41,988 - octoprint.plugin.core - INFO - Found 14 plugin(s) providing 14 mixin implementations, 25 hook handlers
2020-04-21 16:30:41,991 - octoprint.printer.profile - ERROR - Profile _default does not exist, creating _default again and setting it as default
2020-04-21 16:30:42,019 - octoprint.filemanager.storage - INFO - Initializing the file metadata for /home/soloelectronicos/.octoprint/uploads...
2020-04-21 16:30:42,019 - octoprint.filemanager.storage - INFO - ... file metadata for /home/soloelectronicos/.octoprint/uploads initialized successfully.
2020-04-21 16:30:42,022 - octoprint.server - INFO - Added new permission from plugin action_command_prompt: PLUGIN_ACTION_COMMAND_PROMPT_INTERACT (needs: u"Need(method='role', value=u'plugin_action_command_prompt_interact')")
2020-04-21 16:30:42,022 - octoprint.server - INFO - Added new permission from plugin announcements: PLUGIN_ANNOUNCEMENTS_READ (needs: u"Need(method='role', value=u'plugin_announcements_read')")
2020-04-21 16:30:42,022 - octoprint.server - INFO - Added new permission from plugin announcements: PLUGIN_ANNOUNCEMENTS_MANAGE (needs: u"Need(method='role', value=u'plugin_announcements_manage'), Need(method='role', value=u'plugin_announcements_read')")
2020-04-21 16:30:42,023 - octoprint.server - INFO - Added new permission from plugin appkeys: PLUGIN_APPKEYS_ADMIN (needs: u"Need(method='role', value=u'plugin_appkeys_admin')")
2020-04-21 16:30:42,023 - octoprint.server - INFO - Added new permission from plugin backup: PLUGIN_BACKUP_ACCESS (needs: u"Need(method='role', value=u'plugin_backup_access')")
2020-04-21 16:30:42,024 - octoprint.server - INFO - Added new permission from plugin logging: PLUGIN_LOGGING_MANAGE (needs: u"Need(method='role', value=u'plugin_logging_manage')")
2020-04-21 16:30:42,024 - octoprint.server - INFO - Added new permission from plugin pluginmanager: PLUGIN_PLUGINMANAGER_MANAGE (needs: u"Need(method='role', value=u'plugin_pluginmanager_manage')")
2020-04-21 16:30:42,025 - octoprint.server - INFO - Added new permission from plugin pluginmanager: PLUGIN_PLUGINMANAGER_INSTALL (needs: u"Need(method='role', value=u'plugin_pluginmanager_install'), Need(method='role', value=u'plugin_pluginmanager_manage')")
2020-04-21 16:30:42,025 - octoprint.server - INFO - Added new permission from plugin printer_safety_check: PLUGIN_PRINTER_SAFETY_CHECK_DISPLAY (needs: u"Need(method='role', value=u'plugin_printer_safety_check_display')")
2020-04-21 16:30:42,026 - octoprint.server - INFO - Added new permission from plugin softwareupdate: PLUGIN_SOFTWAREUPDATE_CHECK (needs: u"Need(method='role', value=u'plugin_softwareupdate_check')")
2020-04-21 16:30:42,027 - octoprint.server - INFO - Added new permission from plugin softwareupdate: PLUGIN_SOFTWAREUPDATE_UPDATE (needs: u"Need(method='role', value=u'plugin_softwareupdate_update')")
2020-04-21 16:30:42,351 - octoprint.util.pip - INFO - Using "/home/soloelectronicos/OctoPrint/venv/bin/python2 -m pip" as command to invoke pip
2020-04-21 16:30:42,618 - octoprint.util.pip - INFO - Version of pip is 20.0.2
2020-04-21 16:30:42,618 - octoprint.util.pip - INFO - pip installs to /home/soloelectronicos/OctoPrint/venv/lib/python2.7/site-packages (writable -> yes), --user flag needed -> no, virtual env -> yes
2020-04-21 16:30:42,619 - octoprint.util.pip - INFO - ==> pip ok -> yes
2020-04-21 16:30:42,621 - octoprint.plugin.core - INFO - Initialized 14 plugin implementation(s)
2020-04-21 16:30:42,643 - octoprint.plugin.core - INFO - 14 plugin(s) registered with the system:
|  Action Command Prompt Support (bundled) = /home/soloelectronicos/OctoPrint/venv/lib/python2.7/site-packages/octoprint/plugins/action_command_prompt
|  Announcement Plugin (bundled) = /home/soloelectronicos/OctoPrint/venv/lib/python2.7/site-packages/octoprint/plugins/announcements
|  Anonymous Usage Tracking (bundled) = /home/soloelectronicos/OctoPrint/venv/lib/python2.7/site-packages/octoprint/plugins/tracking
|  Application Keys Plugin (bundled) = /home/soloelectronicos/OctoPrint/venv/lib/python2.7/site-packages/octoprint/plugins/appkeys
|  Backup & Restore (bundled) = /home/soloelectronicos/OctoPrint/venv/lib/python2.7/site-packages/octoprint/plugins/backup
|  Core Wizard (bundled) = /home/soloelectronicos/OctoPrint/venv/lib/python2.7/site-packages/octoprint/plugins/corewizard
|  Discovery (bundled) = /home/soloelectronicos/OctoPrint/venv/lib/python2.7/site-packages/octoprint/plugins/discovery
|  Error Tracking (bundled) = /home/soloelectronicos/OctoPrint/venv/lib/python2.7/site-packages/octoprint/plugins/errortracking
|  Logging (bundled) = /home/soloelectronicos/OctoPrint/venv/lib/python2.7/site-packages/octoprint/plugins/logging
|  Login UI (bundled) = /home/soloelectronicos/OctoPrint/venv/lib/python2.7/site-packages/octoprint/plugins/loginui
|  Plugin Manager (bundled) = /home/soloelectronicos/OctoPrint/venv/lib/python2.7/site-packages/octoprint/plugins/pluginmanager
|  Printer Safety Check (bundled) = /home/soloelectronicos/OctoPrint/venv/lib/python2.7/site-packages/octoprint/plugins/printer_safety_check
|  Software Update (bundled) = /home/soloelectronicos/OctoPrint/venv/lib/python2.7/site-packages/octoprint/plugins/softwareupdate
|  Virtual Printer (bundled) = /home/soloelectronicos/OctoPrint/venv/lib/python2.7/site-packages/octoprint/plugins/virtual_printer
Prefix legend: ! = disabled, # = blacklisted, * = incompatible
2020-04-21 16:30:42,687 - octoprint.environment - INFO - Detected environment is Python 2.7.17 under Linux (linux2). Details:
|  hardware:
|      cores: 2
|      freq: 2201.0
|      ram: 2081136640
|  os:
|      id: linux
|      platform: linux2
|  python:
|      pip: 20.0.2
|      version: 2.7.17
|      virtualenv: /home/soloelectronicos/OctoPrint/venv
2020-04-21 16:30:42,694 - octoprint.server - INFO - Reset webasset folder /home/soloelectronicos/.octoprint/generated/webassets...
2020-04-21 16:30:42,695 - octoprint.server - INFO - Reset webasset folder /home/soloelectronicos/.octoprint/generated/.webassets-cache...
2020-04-21 16:30:42,956 - octoprint.server - INFO - Shutting down intermediary server...
2020-04-21 16:30:43,444 - octoprint.server - INFO - Intermediary server shut down
2020-04-21 16:30:43,448 - octoprint.events - INFO - Processing startup event, this is our first event
2020-04-21 16:30:43,450 - octoprint.events - INFO - Adding 0 events to queue that were held back before startup event
2020-04-21 16:30:43,452 - octoprint.filemanager - INFO - Adding backlog items from all storage types to analysis queue...
2020-04-21 16:30:43,456 - octoprint.server.util.watchdog - INFO - Running initial scan on watched folder...
2020-04-21 16:30:43,456 - octoprint.filemanager - INFO - Added 0 items from storage type "local" to analysis queue
2020-04-21 16:30:43,459 - octoprint.server.util.watchdog - INFO - ... initial scan done.
2020-04-21 16:30:43,465 - octoprint.server - INFO - Listening on http://0.0.0.0:5000 and http://[::]:5000
2020-04-21 16:30:43,465 - octoprint.plugins.discovery - INFO - Registered OctoPrint instance on ubuntusoloelectronicos for SSDP
2020-04-21 16:30:43,762 - octoprint.util.pip - INFO - Using "/home/soloelectronicos/OctoPrint/venv/bin/python2 -m pip" as command to invoke pip
2020-04-21 16:30:43,763 - octoprint.util.pip - INFO - pip installs to /home/soloelectronicos/OctoPrint/venv/lib/python2.7/site-packages (writable -> yes), --user flag needed -> no, virtual env -> yes
2020-04-21 16:30:43,763 - octoprint.util.pip - INFO - ==> pip ok -> yes
2020-04-21 16:30:43,800 - octoprint.plugins.announcements - INFO - Loaded channel _important from https://octoprint.org/feeds/important.xml in 0.31s
2020-04-21 16:30:43,866 - octoprint.plugins.pluginmanager - INFO - Loaded plugin repository data from https://plugins.octoprint.org/plugins.json
2020-04-21 16:30:44,163 - octoprint.plugins.announcements - INFO - Loaded channel _releases from https://octoprint.org/feeds/releases.xml in 0.3s
2020-04-21 16:30:44,583 - octoprint.util.pip - INFO - Using "/home/soloelectronicos/OctoPrint/venv/bin/python2 -m pip" as command to invoke pip
2020-04-21 16:30:44,627 - octoprint.plugins.pluginmanager - INFO - Loaded plugin notices data from https://plugins.octoprint.org/notices.json
2020-04-21 16:30:44,846 - octoprint.plugins.announcements - INFO - Loaded channel _blog from https://octoprint.org/feeds/octoblog.xml in 0.28s
2020-04-21 16:30:45,653 - octoprint.util.pip - INFO - pip installs to /home/soloelectronicos/OctoPrint/venv/lib/python2.7/site-packages/ (writable -> yes), --user flag needed -> no, virtual env -> yes
2020-04-21 16:30:45,653 - octoprint.util.pip - INFO - ==> pip ok -> yes
2020-04-21 16:30:45,660 - octoprint.plugins.softwareupdate - INFO - Saved version cache to disk
2020-04-21 16:30:46,286 - octoprint.plugins.announcements - INFO - Loaded channel _plugins from https://plugins.octoprint.org/feed.xml in 1.4s
2020-04-21 16:30:46,624 - octoprint.plugins.announcements - INFO - Loaded channel _octopi from https://octoprint.org/feeds/octopi.xml in 0.29s
2020-04-21 16:45:41,912 - octoprint.server.heartbeat - INFO - Server heartbeat <3
2020-04-21 17:00:41,913 - octoprint.server.heartbeat - INFO - Server heartbeat <3
2020-04-21 17:15:41,915 - octoprint.server.heartbeat - INFO - Server heartbeat <3
2020-04-21 17:30:41,916 - octoprint.server.heartbeat - INFO - Server heartbeat <3
2020-04-21 17:45:41,918 - octoprint.server.heartbeat - INFO - Server heartbeat <3
2020-04-21 17:46:03,908 - octoprint.server.util.flask.PreemptiveCache - INFO - Adding entry for / and {'query_string': u'l10n=en', 'path': u'/', u'_count': 1, u'_timestamp': 1587483963.908261, 'base_url': u'http://127.0.0.1:5000/'}
2020-04-21 17:46:07,147 - octoprint.server.util.sockjs - INFO - New connection from client: 127.0.0.1
2020-04-21 17:46:08,325 - tornado.access - WARNING - 403 GET /api/printerprofiles/_default (127.0.0.1) 5.30ms
Log de ejecucion :
soloelectronicos@ubuntusoloelectronicos:~$ sudo apt install python-pip python-dev python-setuptools python-virtualenv git libyaml-dev build-essential
[sudo] contraseña para soloelectronicos:
Leyendo lista de paquetes... Hecho
Creando árbol de dependencias
Leyendo la información de estado... Hecho
El paquete indicado a continuación se instaló de forma automática y ya no es necesario.
libllvm6.0
Utilice «sudo apt autoremove» para eliminarlo.
Se instalarán los siguientes paquetes adicionales:
dpkg-dev fakeroot git-man libalgorithm-diff-perl libalgorithm-diff-xs-perl
libalgorithm-merge-perl liberror-perl libfakeroot libpython-all-dev
libpython-dev libpython2.7-dev make python-all python-all-dev python-crypto
python-keyring python-keyrings.alt python-pip-whl python-secretstorage
python-wheel python-xdg python2.7-dev python3-virtualenv virtualenv
Paquetes sugeridos:
debian-keyring git-daemon-run | git-daemon-sysvinit git-doc git-el git-email
git-gui gitk gitweb git-cvs git-mediawiki git-svn libyaml-doc make-doc
python-crypto-doc libkf5wallet-bin gir1.2-gnomekeyring-1.0 python-fs
python-gdata python-keyczar python-secretstorage-doc python-setuptools-doc
Se instalarán los siguientes paquetes NUEVOS:
build-essential dpkg-dev fakeroot git git-man libalgorithm-diff-perl
libalgorithm-diff-xs-perl libalgorithm-merge-perl liberror-perl libfakeroot
libpython-all-dev libpython-dev libpython2.7-dev libyaml-dev make python-all
python-all-dev python-crypto python-dev python-keyring python-keyrings.alt
python-pip python-pip-whl python-secretstorage python-setuptools
python-virtualenv python-wheel python-xdg python2.7-dev python3-virtualenv
virtualenv
0 actualizados, 31 nuevos se instalarán, 0 para eliminar y 8 no actualizados.
Se necesita descargar 36,9 MB de archivos.
Se utilizarán 85,4 MB de espacio de disco adicional después de esta operación.
¿Desea continuar? [S/n] S
Des:1 http://es.archive.ubuntu.com/ubuntu bionic/main amd64 make amd64 4.1-9.1ubuntu1 [154 kB]
Des:2 http://es.archive.ubuntu.com/ubuntu bionic-updates/main amd64 dpkg-dev all 1.19.0.5ubuntu2.3 [607 kB]
Des:3 http://es.archive.ubuntu.com/ubuntu bionic/main amd64 build-essential amd64 12.4ubuntu1 [4.758 B]
Des:4 http://es.archive.ubuntu.com/ubuntu bionic/main amd64 libfakeroot amd64 1.22-2ubuntu1 [25,9 kB]
Des:5 http://es.archive.ubuntu.com/ubuntu bionic/main amd64 fakeroot amd64 1.22-2ubuntu1 [62,3 kB]
Des:6 http://es.archive.ubuntu.com/ubuntu bionic/main amd64 liberror-perl all 0.17025-1 [22,8 kB]
Des:7 http://es.archive.ubuntu.com/ubuntu bionic-updates/main amd64 git-man all 1:2.17.1-1ubuntu0.7 [804 kB]
Des:8 http://es.archive.ubuntu.com/ubuntu bionic-updates/main amd64 git amd64 1:2.17.1-1ubuntu0.7 [3.915 kB]
Des:9 http://es.archive.ubuntu.com/ubuntu bionic/main amd64 libalgorithm-diff-perl all 1.19.03-1 [47,6 kB]
Des:10 http://es.archive.ubuntu.com/ubuntu bionic/main amd64 libalgorithm-diff-xs-perl amd64 0.04-5 [11,1 kB]
Des:11 http://es.archive.ubuntu.com/ubuntu bionic/main amd64 libalgorithm-merge-perl all 0.08-3 [12,0 kB]
Des:12 http://es.archive.ubuntu.com/ubuntu bionic-updates/main amd64 libpython2.7-dev amd64 2.7.17-1~18.04 [28,3 MB]
Des:13 http://es.archive.ubuntu.com/ubuntu bionic/main amd64 libpython-dev amd64 2.7.15~rc1-1 [7.684 B]
Des:14 http://es.archive.ubuntu.com/ubuntu bionic/main amd64 libpython-all-dev amd64 2.7.15~rc1-1 [1.092 B]
Des:15 http://es.archive.ubuntu.com/ubuntu bionic/main amd64 python-all amd64 2.7.15~rc1-1 [1.076 B]
Des:16 http://es.archive.ubuntu.com/ubuntu bionic-updates/main amd64 python2.7-dev amd64 2.7.17-1~18.04 [277 kB]
Des:17 http://es.archive.ubuntu.com/ubuntu bionic/main amd64 python-dev amd64 2.7.15~rc1-1 [1.256 B]
Des:18 http://es.archive.ubuntu.com/ubuntu bionic/main amd64 python-all-dev amd64 2.7.15~rc1-1 [1.100 B]
Des:19 http://es.archive.ubuntu.com/ubuntu bionic/main amd64 python-crypto amd64 2.6.1-8ubuntu2 [244 kB]
Des:20 http://es.archive.ubuntu.com/ubuntu bionic/main amd64 python-secretstorage all 2.3.1-2 [11,8 kB]
Des:21 http://es.archive.ubuntu.com/ubuntu bionic/main amd64 python-keyring all 10.6.0-1 [30,6 kB]
Des:22 http://es.archive.ubuntu.com/ubuntu bionic/main amd64 python-keyrings.alt all 3.0-1 [16,7 kB]
Des:23 http://es.archive.ubuntu.com/ubuntu bionic-updates/universe amd64 python-pip-whl all 9.0.1-2.3~ubuntu1.18.04.1 [1.653 kB]
Des:24 http://es.archive.ubuntu.com/ubuntu bionic-updates/universe amd64 python-pip all 9.0.1-2.3~ubuntu1.18.04.1 [151 kB]
Des:25 http://es.archive.ubuntu.com/ubuntu bionic/main amd64 python-setuptools all 39.0.1-2 [329 kB]
Des:26 http://es.archive.ubuntu.com/ubuntu bionic/universe amd64 python-virtualenv all 15.1.0+ds-1.1 [46,8 kB]
Des:27 http://es.archive.ubuntu.com/ubuntu bionic/universe amd64 python-wheel all 0.30.0-0.2 [36,4 kB]
Des:28 http://es.archive.ubuntu.com/ubuntu bionic/universe amd64 python-xdg all 0.25-4ubuntu1 [31,3 kB]
Des:29 http://es.archive.ubuntu.com/ubuntu bionic/universe amd64 python3-virtualenv all 15.1.0+ds-1.1 [43,4 kB]
Des:30 http://es.archive.ubuntu.com/ubuntu bionic/universe amd64 virtualenv all 15.1.0+ds-1.1 [4.476 B]
Des:31 http://es.archive.ubuntu.com/ubuntu bionic/main amd64 libyaml-dev amd64 0.1.7-2ubuntu3 [55,7 kB]
Descargados 36,9 MB en 6s (5.898 kB/s)
Extrayendo plantillas para los paquetes: 100%
Seleccionando el paquete make previamente no seleccionado.
(Leyendo la base de datos ... 163591 ficheros o directorios instalados actualmente.)
Preparando para desempaquetar .../00-make_4.1-9.1ubuntu1_amd64.deb ...
Desempaquetando make (4.1-9.1ubuntu1) ...
Seleccionando el paquete dpkg-dev previamente no seleccionado.
Preparando para desempaquetar .../01-dpkg-dev_1.19.0.5ubuntu2.3_all.deb ...
Desempaquetando dpkg-dev (1.19.0.5ubuntu2.3) ...
Seleccionando el paquete build-essential previamente no seleccionado.
Preparando para desempaquetar .../02-build-essential_12.4ubuntu1_amd64.deb ...
Desempaquetando build-essential (12.4ubuntu1) ...
Seleccionando el paquete libfakeroot:amd64 previamente no seleccionado.
Preparando para desempaquetar .../03-libfakeroot_1.22-2ubuntu1_amd64.deb ...
Desempaquetando libfakeroot:amd64 (1.22-2ubuntu1) ...
Seleccionando el paquete fakeroot previamente no seleccionado.
Preparando para desempaquetar .../04-fakeroot_1.22-2ubuntu1_amd64.deb ...
Desempaquetando fakeroot (1.22-2ubuntu1) ...
Seleccionando el paquete liberror-perl previamente no seleccionado.
Preparando para desempaquetar .../05-liberror-perl_0.17025-1_all.deb ...
Desempaquetando liberror-perl (0.17025-1) ...
Seleccionando el paquete git-man previamente no seleccionado.
Preparando para desempaquetar .../06-git-man_1%3a2.17.1-1ubuntu0.7_all.deb ...
Desempaquetando git-man (1:2.17.1-1ubuntu0.7) ...
Seleccionando el paquete git previamente no seleccionado.
Preparando para desempaquetar .../07-git_1%3a2.17.1-1ubuntu0.7_amd64.deb ...
Desempaquetando git (1:2.17.1-1ubuntu0.7) ...
Seleccionando el paquete libalgorithm-diff-perl previamente no seleccionado.
Preparando para desempaquetar .../08-libalgorithm-diff-perl_1.19.03-1_all.deb ...
Desempaquetando libalgorithm-diff-perl (1.19.03-1) ...
Seleccionando el paquete libalgorithm-diff-xs-perl previamente no seleccionado.
Preparando para desempaquetar .../09-libalgorithm-diff-xs-perl_0.04-5_amd64.deb ...
Desempaquetando libalgorithm-diff-xs-perl (0.04-5) ...
Seleccionando el paquete libalgorithm-merge-perl previamente no seleccionado.
Preparando para desempaquetar .../10-libalgorithm-merge-perl_0.08-3_all.deb ...
Desempaquetando libalgorithm-merge-perl (0.08-3) ...
Seleccionando el paquete libpython2.7-dev:amd64 previamente no seleccionado.
Preparando para desempaquetar .../11-libpython2.7-dev_2.7.17-1~18.04_amd64.deb ...
Desempaquetando libpython2.7-dev:amd64 (2.7.17-1~18.04) ...
Seleccionando el paquete libpython-dev:amd64 previamente no seleccionado.
Preparando para desempaquetar .../12-libpython-dev_2.7.15~rc1-1_amd64.deb ...
Desempaquetando libpython-dev:amd64 (2.7.15~rc1-1) ...
Seleccionando el paquete libpython-all-dev:amd64 previamente no seleccionado.
Preparando para desempaquetar .../13-libpython-all-dev_2.7.15~rc1-1_amd64.deb ...
Desempaquetando libpython-all-dev:amd64 (2.7.15~rc1-1) ...
Seleccionando el paquete python-all previamente no seleccionado.
Preparando para desempaquetar .../14-python-all_2.7.15~rc1-1_amd64.deb ...
Desempaquetando python-all (2.7.15~rc1-1) ...
Seleccionando el paquete python2.7-dev previamente no seleccionado.
Preparando para desempaquetar .../15-python2.7-dev_2.7.17-1~18.04_amd64.deb ...
Desempaquetando python2.7-dev (2.7.17-1~18.04) ...
Seleccionando el paquete python-dev previamente no seleccionado.
Preparando para desempaquetar .../16-python-dev_2.7.15~rc1-1_amd64.deb ...
Desempaquetando python-dev (2.7.15~rc1-1) ...
Seleccionando el paquete python-all-dev previamente no seleccionado.
Preparando para desempaquetar .../17-python-all-dev_2.7.15~rc1-1_amd64.deb ...
Desempaquetando python-all-dev (2.7.15~rc1-1) ...
Seleccionando el paquete python-crypto previamente no seleccionado.
Preparando para desempaquetar .../18-python-crypto_2.6.1-8ubuntu2_amd64.deb ...
Desempaquetando python-crypto (2.6.1-8ubuntu2) ...
Seleccionando el paquete python-secretstorage previamente no seleccionado.
Preparando para desempaquetar .../19-python-secretstorage_2.3.1-2_all.deb ...
Desempaquetando python-secretstorage (2.3.1-2) ...
Seleccionando el paquete python-keyring previamente no seleccionado.
Preparando para desempaquetar .../20-python-keyring_10.6.0-1_all.deb ...
Desempaquetando python-keyring (10.6.0-1) ...
Seleccionando el paquete python-keyrings.alt previamente no seleccionado.
Preparando para desempaquetar .../21-python-keyrings.alt_3.0-1_all.deb ...
Desempaquetando python-keyrings.alt (3.0-1) ...
Seleccionando el paquete python-pip-whl previamente no seleccionado.
Preparando para desempaquetar .../22-python-pip-whl_9.0.1-2.3~ubuntu1.18.04.1_all.deb ...
Desempaquetando python-pip-whl (9.0.1-2.3~ubuntu1.18.04.1) ...
Seleccionando el paquete python-pip previamente no seleccionado.
Preparando para desempaquetar .../23-python-pip_9.0.1-2.3~ubuntu1.18.04.1_all.deb ...
Desempaquetando python-pip (9.0.1-2.3~ubuntu1.18.04.1) ...
Seleccionando el paquete python-setuptools previamente no seleccionado.
Preparando para desempaquetar .../24-python-setuptools_39.0.1-2_all.deb ...
Desempaquetando python-setuptools (39.0.1-2) ...
Seleccionando el paquete python-virtualenv previamente no seleccionado.
Preparando para desempaquetar .../25-python-virtualenv_15.1.0+ds-1.1_all.deb ...
Desempaquetando python-virtualenv (15.1.0+ds-1.1) ...
Seleccionando el paquete python-wheel previamente no seleccionado.
Preparando para desempaquetar .../26-python-wheel_0.30.0-0.2_all.deb ...
Desempaquetando python-wheel (0.30.0-0.2) ...
Seleccionando el paquete python-xdg previamente no seleccionado.
Preparando para desempaquetar .../27-python-xdg_0.25-4ubuntu1_all.deb ...
Desempaquetando python-xdg (0.25-4ubuntu1) ...
Seleccionando el paquete python3-virtualenv previamente no seleccionado.
Preparando para desempaquetar .../28-python3-virtualenv_15.1.0+ds-1.1_all.deb ...
Desempaquetando python3-virtualenv (15.1.0+ds-1.1) ...
Seleccionando el paquete virtualenv previamente no seleccionado.
Preparando para desempaquetar .../29-virtualenv_15.1.0+ds-1.1_all.deb ...
Desempaquetando virtualenv (15.1.0+ds-1.1) ...
Seleccionando el paquete libyaml-dev:amd64 previamente no seleccionado.
Preparando para desempaquetar .../30-libyaml-dev_0.1.7-2ubuntu3_amd64.deb ...
Desempaquetando libyaml-dev:amd64 (0.1.7-2ubuntu3) ...
Configurando python-secretstorage (2.3.1-2) ...
Configurando python-pip-whl (9.0.1-2.3~ubuntu1.18.04.1) ...
Configurando python-setuptools (39.0.1-2) ...
Configurando git-man (1:2.17.1-1ubuntu0.7) ...
Configurando make (4.1-9.1ubuntu1) ...
Configurando python-crypto (2.6.1-8ubuntu2) ...
Configurando python-keyring (10.6.0-1) ...
Configurando liberror-perl (0.17025-1) ...
Configurando python-wheel (0.30.0-0.2) ...
Configurando libyaml-dev:amd64 (0.1.7-2ubuntu3) ...
Configurando python-keyrings.alt (3.0-1) ...
Configurando dpkg-dev (1.19.0.5ubuntu2.3) ...
Configurando python3-virtualenv (15.1.0+ds-1.1) ...
Configurando libfakeroot:amd64 (1.22-2ubuntu1) ...
Configurando python-virtualenv (15.1.0+ds-1.1) ...
Configurando libalgorithm-diff-perl (1.19.03-1) ...
Configurando libpython2.7-dev:amd64 (2.7.17-1~18.04) ...
Configurando python-pip (9.0.1-2.3~ubuntu1.18.04.1) ...
Configurando virtualenv (15.1.0+ds-1.1) ...
Configurando python2.7-dev (2.7.17-1~18.04) ...
Configurando python-all (2.7.15~rc1-1) ...
Configurando git (1:2.17.1-1ubuntu0.7) ...
Configurando python-xdg (0.25-4ubuntu1) ...
Configurando libpython-dev:amd64 (2.7.15~rc1-1) ...
Configurando build-essential (12.4ubuntu1) ...
Configurando python-dev (2.7.15~rc1-1) ...
Configurando libpython-all-dev:amd64 (2.7.15~rc1-1) ...
Configurando fakeroot (1.22-2ubuntu1) ...
update-alternatives: utilizando /usr/bin/fakeroot-sysv para proveer /usr/bin/fakeroot (fakeroot) en modo automático
Configurando libalgorithm-merge-perl (0.08-3) ...
Configurando libalgorithm-diff-xs-perl (0.04-5) ...
Configurando python-all-dev (2.7.15~rc1-1) ...
Procesando disparadores para libc-bin (2.27-3ubuntu1) ...
Procesando disparadores para man-db (2.8.3-2ubuntu0.1) ...
soloelectronicos@ubuntusoloelectronicos:~$ mkdir OctoPrint && cd OctoPrint
soloelectronicos@ubuntusoloelectronicos:~/OctoPrint$ virtualenv venv
Running virtualenv with interpreter /usr/bin/python2
New python executable in /home/soloelectronicos/OctoPrint/venv/bin/python2
Also creating executable in /home/soloelectronicos/OctoPrint/venv/bin/python
Installing setuptools, pkg_resources, pip, wheel...done.
soloelectronicos@ubuntusoloelectronicos:~/OctoPrint$ source venv/bin/activate
(venv) soloelectronicos@ubuntusoloelectronicos:~/OctoPrint$ pip install pip --upgrade
DEPRECATION: Python 2.7 reached the end of its life on January 1st, 2020. Please upgrade your Python as Python 2.7 is no longer maintained. A future version of pip will drop support for Python 2.7. More details about Python 2 support in pip, can be found at https://pip.pypa.io/en/latest/development/release-process/#python-2-support
(venv) soloelectronicos@ubuntusoloelectronicos:~/OctoPrint$ pip install octoprint
DEPRECATION: Python 2.7 reached the end of its life on January 1st, 2020. Please upgrade your Python as Python 2.7 is no longer maintained. A future version of pip will drop support for Python 2.7. More details about Python 2 support in pip, can be found at https://pip.pypa.io/en/latest/development/release-process/#python-2-support
Collecting octoprint
Downloading OctoPrint-1.4.0-py2.py3-none-any.whl (3.3 MB)
|████████████████████████████████| 3.3 MB 1.6 MB/s
Collecting websocket-client<0.57,>=0.56
Downloading websocket_client-0.56.0-py2.py3-none-any.whl (200 kB)
|████████████████████████████████| 200 kB 5.8 MB/s
Collecting pylru<1.3,>=1.2
Downloading pylru-1.2.0.tar.gz (18 kB)
Collecting psutil<5.7,>=5.6.5
Downloading psutil-5.6.7.tar.gz (448 kB)
|████████████████████████████████| 448 kB 3.8 MB/s
Collecting sarge==0.1.5post0
Downloading sarge-0.1.5.post0.tar.gz (17 kB)
Collecting flask<0.13,>=0.12
Downloading Flask-0.12.5-py2.py3-none-any.whl (81 kB)
|████████████████████████████████| 81 kB 1.6 MB/s
Collecting Flask-Babel<0.13,>=0.12
Downloading Flask-Babel-0.12.2.tar.gz (44 kB)
|████████████████████████████████| 44 kB 511 kB/s
Collecting werkzeug<0.17,>=0.16
Downloading Werkzeug-0.16.1-py2.py3-none-any.whl (327 kB)
|████████████████████████████████| 327 kB 5.2 MB/s
Collecting tornado==4.5.3
Downloading tornado-4.5.3.tar.gz (484 kB)
|████████████████████████████████| 484 kB 5.3 MB/s
Collecting frozendict<1.3,>=1.2
Downloading frozendict-1.2.tar.gz (2.6 kB)
Collecting wrapt<1.12,>=1.11.2
Downloading wrapt-1.11.2.tar.gz (27 kB)
Collecting monotonic<1.6,>=1.5; python_version < "3"
Downloading monotonic-1.5-py2.py3-none-any.whl (5.3 kB)
Collecting PyYAML<6,>=5.1
Downloading PyYAML-5.3.1.tar.gz (269 kB)
|████████████████████████████████| 269 kB 5.2 MB/s
Collecting netifaces<0.11,>=0.10.9
Downloading netifaces-0.10.9-cp27-cp27mu-manylinux1_x86_64.whl (31 kB)
Collecting semantic-version<2.9,>=2.8
Downloading semantic_version-2.8.4-py2.py3-none-any.whl (15 kB)
Collecting scandir<1.11,>=1.10; python_version < "3"
Downloading scandir-1.10.0.tar.gz (33 kB)
Collecting chainmap<1.1,>=1.0.3; python_version < "3"
Downloading chainmap-1.0.3.tar.gz (6.3 kB)
Collecting Click<8,>=7
Downloading click-7.1.1-py2.py3-none-any.whl (82 kB)
|████████████████████████████████| 82 kB 275 kB/s
Collecting awesome-slugify<1.7,>=1.6.5
Downloading awesome-slugify-1.6.5.tar.gz (8.4 kB)
Collecting pkginfo<1.6,>=1.5.0.1
Downloading pkginfo-1.5.0.1-py2.py3-none-any.whl (25 kB)
Collecting Flask-Login<0.5,>=0.4.1
Downloading Flask-Login-0.4.1.tar.gz (14 kB)
Collecting Jinja2<2.9,>=2.8.1
Downloading Jinja2-2.8.1-py2.py3-none-any.whl (264 kB)
|████████████████████████████████| 264 kB 9.1 MB/s
Collecting markdown<3.2,>=3.1
Downloading Markdown-3.1.1-py2.py3-none-any.whl (87 kB)
|████████████████████████████████| 87 kB 1.3 MB/s
Collecting cachelib<0.2,>=0.1
Downloading cachelib-0.1.tar.gz (9.8 kB)
Collecting requests<3,>=2.22.0
Downloading requests-2.23.0-py2.py3-none-any.whl (58 kB)
|████████████████████████████████| 58 kB 1.4 MB/s
Collecting Flask-Assets<0.13,>=0.12
Downloading Flask-Assets-0.12.tar.gz (22 kB)
Collecting watchdog<0.10,>=0.9.0
Downloading watchdog-0.9.0.tar.gz (85 kB)
|████████████████████████████████| 85 kB 909 kB/s
Collecting netaddr<0.8,>=0.7.19
Downloading netaddr-0.7.19-py2.py3-none-any.whl (1.6 MB)
|████████████████████████████████| 1.6 MB 5.9 MB/s
Collecting feedparser<5.3,>=5.2.1
Downloading feedparser-5.2.1.tar.bz2 (192 kB)
|████████████████████████████████| 192 kB 6.7 MB/s
Collecting futures<3.4,>=3.3; python_version < "3"
Downloading futures-3.3.0-py2-none-any.whl (16 kB)
Collecting future<0.19,>=0.18.2
Downloading future-0.18.2.tar.gz (829 kB)
|████████████████████████████████| 829 kB 4.9 MB/s
Collecting typing<4,>=3.7.4.1; python_version < "3"
Downloading typing-3.7.4.1-py2-none-any.whl (26 kB)
Collecting rsa<5,>=4.0
Downloading rsa-4.0-py2.py3-none-any.whl (38 kB)
Collecting sentry-sdk==0.13.2
Downloading sentry_sdk-0.13.2-py2.py3-none-any.whl (91 kB)
|████████████████████████████████| 91 kB 2.0 MB/s
Collecting regex!=2018.11.6
Downloading regex-2020.4.4.tar.gz (695 kB)
|████████████████████████████████| 695 kB 4.4 MB/s
Collecting filetype<2,>=1.0.5
Downloading filetype-1.0.6-py2.py3-none-any.whl (15 kB)
Collecting pyserial<3.5,>=3.4
Downloading pyserial-3.4-py2.py3-none-any.whl (193 kB)
|████████████████████████████████| 193 kB 4.3 MB/s
Collecting emoji<0.6,>=0.5.4
Downloading emoji-0.5.4.tar.gz (43 kB)
|████████████████████████████████| 43 kB 96 kB/s
Collecting blinker<1.5,>=1.4
Downloading blinker-1.4.tar.gz (111 kB)
|████████████████████████████████| 111 kB 6.2 MB/s
Collecting six
Downloading six-1.14.0-py2.py3-none-any.whl (10 kB)
Collecting itsdangerous>=0.21
Downloading itsdangerous-1.1.0-py2.py3-none-any.whl (16 kB)
Collecting Babel>=2.3
Downloading Babel-2.8.0-py2.py3-none-any.whl (8.6 MB)
|████████████████████████████████| 8.6 MB 45 kB/s
Collecting singledispatch
Downloading singledispatch-3.4.0.3-py2.py3-none-any.whl (12 kB)
Collecting certifi
Downloading certifi-2020.4.5.1-py2.py3-none-any.whl (157 kB)
|████████████████████████████████| 157 kB 4.6 MB/s
Collecting backports_abc>=0.4
Downloading backports_abc-0.5-py2.py3-none-any.whl (5.2 kB)
Collecting Unidecode<0.05,>=0.04.14
Downloading Unidecode-0.04.21-py2.py3-none-any.whl (228 kB)
|████████████████████████████████| 228 kB 6.4 MB/s
Collecting MarkupSafe
Downloading MarkupSafe-1.1.1-cp27-cp27mu-manylinux1_x86_64.whl (24 kB)
Requirement already satisfied: setuptools>=36 in ./venv/lib/python2.7/site-packages (from markdown<3.2,>=3.1->octoprint) (44.1.0)
Collecting idna<3,>=2.5
Downloading idna-2.9-py2.py3-none-any.whl (58 kB)
|████████████████████████████████| 58 kB 1.5 MB/s
Collecting chardet<4,>=3.0.2
Downloading chardet-3.0.4-py2.py3-none-any.whl (133 kB)
|████████████████████████████████| 133 kB 5.0 MB/s
Collecting urllib3!=1.25.0,!=1.25.1,<1.26,>=1.21.1
Downloading urllib3-1.25.9-py2.py3-none-any.whl (126 kB)
|████████████████████████████████| 126 kB 28 kB/s
Collecting webassets>=0.11.1
Downloading webassets-2.0.tar.gz (288 kB)
|████████████████████████████████| 288 kB 4.9 MB/s
Collecting argh>=0.24.1
Downloading argh-0.26.2-py2.py3-none-any.whl (30 kB)
Collecting pathtools>=0.1.1
Downloading pathtools-0.1.2.tar.gz (11 kB)
Collecting pyasn1>=0.1.3
Downloading pyasn1-0.4.8-py2.py3-none-any.whl (77 kB)
|████████████████████████████████| 77 kB 361 kB/s
Collecting pytz>=2015.7
Downloading pytz-2019.3-py2.py3-none-any.whl (509 kB)
|████████████████████████████████| 509 kB 7.8 MB/s
Building wheels for collected packages: pylru, psutil, sarge, Flask-Babel, tornado, frozendict, wrapt, PyYAML, scandir, chainmap, awesome-slugify, Flask-Login, cachelib, Flask-Assets, watchdog, feedparser, future, regex, emoji, blinker, webassets, pathtools
Building wheel for pylru (setup.py) ... done
Created wheel for pylru: filename=pylru-1.2.0-py2-none-any.whl size=15691 sha256=675dd90404356bf5ed34ec3e564e0123e4bbc29ddcf0631c09a82a9957be7844
Stored in directory: /home/soloelectronicos/.cache/pip/wheels/ad/dc/4f/254e963083f1120664b393883428784ed55be2d494f3e3f720
Building wheel for psutil (setup.py) ... done
Created wheel for psutil: filename=psutil-5.6.7-cp27-cp27mu-linux_x86_64.whl size=258804 sha256=3af6bf302df94d32bcfb8a925cccce28875b6d63d2640eed8f9abe20b5f2a271
Stored in directory: /home/soloelectronicos/.cache/pip/wheels/b6/8c/7a/f28c6f4fa509c6a274590af7eef26e5a206ace8753c59a4257
Building wheel for sarge (setup.py) ... done
Created wheel for sarge: filename=sarge-0.1.5.post0-py2-none-any.whl size=18869 sha256=f23c027afdd626f12a5d7d0529ccd01f3ca9a226e274aafe7c4c03554311b6a2
Stored in directory: /home/soloelectronicos/.cache/pip/wheels/aa/ac/c4/dcefe7565f76a83c484e85a2ba49e3a294eebaddc39d4ce35e
Building wheel for Flask-Babel (setup.py) ... done
Created wheel for Flask-Babel: filename=Flask_Babel-0.12.2-py2-none-any.whl size=9263 sha256=83b1bcfb83dd4b9b318f42f30ee00714874ce2048194a34baff1485003446932
Stored in directory: /home/soloelectronicos/.cache/pip/wheels/ac/10/c9/c58c29cda855cf63d2e4d47c01b619515b36f73b8199ef009e
Building wheel for tornado (setup.py) ... done
Created wheel for tornado: filename=tornado-4.5.3-cp27-cp27mu-linux_x86_64.whl size=431491 sha256=650c2f68942b6bb1cf7094a05077432c656f6c0a8db5390fc7e91192db185ebd
Stored in directory: /home/soloelectronicos/.cache/pip/wheels/6b/95/34/e25e3530e2ed9ed153aec63e467140ac4aa392fcac03691276
Building wheel for frozendict (setup.py) ... done
Created wheel for frozendict: filename=frozendict-1.2-py2-none-any.whl size=3147 sha256=7c9b482a62531cbdee122a5a8a994b0030b8b9aafc3809441ad0c06bbf6ed3ce
Stored in directory: /home/soloelectronicos/.cache/pip/wheels/be/5d/07/a6bd784a07cfa099fa10004afb695654e5a92027092d234b71
Building wheel for wrapt (setup.py) ... done
Created wheel for wrapt: filename=wrapt-1.11.2-cp27-cp27mu-linux_x86_64.whl size=49269 sha256=666d153987e49f9fcadf505f66f5dca3bb0873c44b73baf9bd4ed3d507189ba9
Stored in directory: /home/soloelectronicos/.cache/pip/wheels/aa/0a/cb/e31e525e074359f542ff2240747f3d4cc1dad9c895bb6df70c
Building wheel for PyYAML (setup.py) ... done
Created wheel for PyYAML: filename=PyYAML-5.3.1-cp27-cp27mu-linux_x86_64.whl size=194714 sha256=9e3b68b67abb78274f7a2ad7a8b05b021911e1e93977612e30f9a98c3f764297
Stored in directory: /home/soloelectronicos/.cache/pip/wheels/d1/d5/a0/3c27cdc8b0209c5fc1385afeee936cf8a71e13d885388b4be2
Building wheel for scandir (setup.py) ... done
Created wheel for scandir: filename=scandir-1.10.0-cp27-cp27mu-linux_x86_64.whl size=33234 sha256=4476c72af7bdef553fc3ee2e8c819d0bf2a13d1418c022e8d5049c4ef74c2452
Stored in directory: /home/soloelectronicos/.cache/pip/wheels/58/2c/26/52406f7d1f19bcc47a6fbd1037a5f293492f5cf1d58c539edb
Building wheel for chainmap (setup.py) ... done
Created wheel for chainmap: filename=chainmap-1.0.3-py2-none-any.whl size=4962 sha256=8bcf080b081b2cf2dc20ea7a5954701ce484968654700ed90a98fbf341c6904e
Stored in directory: /home/soloelectronicos/.cache/pip/wheels/b1/0b/42/1e93b86bd3487fd8a4c6455aea79e7f4b7bbc229b24802d336
Building wheel for awesome-slugify (setup.py) ... done
Created wheel for awesome-slugify: filename=awesome_slugify-1.6.5-py2-none-any.whl size=8351 sha256=b4cff01fec24ff6d29ce6eb4bcd3aa30085842740e1a4b88cbc51042755feda9
Stored in directory: /home/soloelectronicos/.cache/pip/wheels/97/b6/b0/9a83c3d0bf0fb904a13fc4cff6aa539cf3bcf21f2965a1c241
Building wheel for Flask-Login (setup.py) ... done
Created wheel for Flask-Login: filename=Flask_Login-0.4.1-py2.py3-none-any.whl size=15933 sha256=56b0fbb535255b68ae789a98f82aa569745fc68adbf3e00574c182994da751c4
Stored in directory: /home/soloelectronicos/.cache/pip/wheels/72/fb/8c/14220bd0fa946a657173c0775d81c23b371ed3ba7dc7b0964e
Building wheel for cachelib (setup.py) ... done
Created wheel for cachelib: filename=cachelib-0.1-py2-none-any.whl size=13017 sha256=324b56ec74d28af9a78f7526b5f8c45b453a15d16cb97cbd77bca8ad19357e46
Stored in directory: /home/soloelectronicos/.cache/pip/wheels/33/a6/f6/c9b0f8cdc86d0ef35777789797afc893cce477a39500ee28d2
Building wheel for Flask-Assets (setup.py) ... done
Created wheel for Flask-Assets: filename=Flask_Assets-0.12-py2-none-any.whl size=8472 sha256=f5f9af6a76d59df6560584f4b271609ae3fd6eafdcf3d0e6d7fdd4d764e43764
Stored in directory: /home/soloelectronicos/.cache/pip/wheels/e2/bd/05/5d056fac0a9041b7d18a79f86fb93f20caf7334dd51eba2af6
Building wheel for watchdog (setup.py) ... done
Created wheel for watchdog: filename=watchdog-0.9.0-py2-none-any.whl size=73651 sha256=47edff5f90cf70785cff3a2d1689285dafee245b5dd613193c2511b4f9e8e56e
Stored in directory: /home/soloelectronicos/.cache/pip/wheels/29/d7/fb/9194ada05f6dfcaea7da16150cd523f783ad918b35da6ee066
Building wheel for feedparser (setup.py) ... done
Created wheel for feedparser: filename=feedparser-5.2.1-py2-none-any.whl size=44995 sha256=63b177c5781d1eaa5ffe9be07e6b61162b747bc15fce48d6ec0392a0d15daec6
Stored in directory: /home/soloelectronicos/.cache/pip/wheels/d4/3c/a1/fd7bcf389a776ce0be95e1e3176421b92dd24d0b78a58908a1
Building wheel for future (setup.py) ... done
Created wheel for future: filename=future-0.18.2-py2-none-any.whl size=502566 sha256=e24550dc4db23f5d47175e58e24a01be299d9981359804646ec70da01f12f6b4
Stored in directory: /home/soloelectronicos/.cache/pip/wheels/5f/11/0c/aad680baf5ef4fbcbab992c9f03e1130357e0c173a4fdabfff
Building wheel for regex (setup.py) ... done
Created wheel for regex: filename=regex-2020.4.4-cp27-cp27mu-linux_x86_64.whl size=344932 sha256=53171cf495b86f57fcd40646a73b75c61dada76ee3d0f46df694576325e1e366
Stored in directory: /home/soloelectronicos/.cache/pip/wheels/9d/6c/47/0e5edf34d09bdab91b48f150ca86fdb0b0f26666a8f7df8ad4
Building wheel for emoji (setup.py) ... done
Created wheel for emoji: filename=emoji-0.5.4-py2-none-any.whl size=42174 sha256=cc29db088a91d6de2e21ebce25792d471a2970f523f1e60a2ab9b6e572fe8a3f
Stored in directory: /home/soloelectronicos/.cache/pip/wheels/01/fb/20/2f71ca373e9334ab3bc6edeac956519d94ec3dcc9fad7c3eb5
Building wheel for blinker (setup.py) ... done
Created wheel for blinker: filename=blinker-1.4-py2-none-any.whl size=13451 sha256=b4ae6cbf1d76ad6f48d8a8e13a7c7da0f948976f356a899d619a262aafeae6dc
Stored in directory: /home/soloelectronicos/.cache/pip/wheels/7b/1f/a0/7ce496c69b9be7cef75645749e256d5ef2dc9d08336f92248b
Building wheel for webassets (setup.py) ... done
Created wheel for webassets: filename=webassets-2.0-py2-none-any.whl size=142871 sha256=ea4a2248dbda0be345a6caef74971b54a65c58ae1cd05654d3ac6e509f739740
Stored in directory: /home/soloelectronicos/.cache/pip/wheels/e2/df/2b/c142c0570f34a8e56187c83045b006e56d5918869ff94a56f6
Building wheel for pathtools (setup.py) ... done
Created wheel for pathtools: filename=pathtools-0.1.2-py2-none-any.whl size=8784 sha256=ac6a73ac9a18654cc20f286ada97c2f2910bc6b7ed85aecef000c2d0e17ebd95
Stored in directory: /home/soloelectronicos/.cache/pip/wheels/da/24/4e/5b716376944d90d1406666897dbd020764405d5242afb5b236
Successfully built pylru psutil sarge Flask-Babel tornado frozendict wrapt PyYAML scandir chainmap awesome-slugify Flask-Login cachelib Flask-Assets watchdog feedparser future regex emoji blinker webassets pathtools
Installing collected packages: six, websocket-client, pylru, psutil, sarge, werkzeug, Click, itsdangerous, MarkupSafe, Jinja2, flask, pytz, Babel, Flask-Babel, singledispatch, certifi, backports-abc, tornado, frozendict, wrapt, monotonic, PyYAML, netifaces, semantic-version, scandir, chainmap, regex, Unidecode, awesome-slugify, pkginfo, Flask-Login, markdown, cachelib, idna, chardet, urllib3, requests, webassets, Flask-Assets, argh, pathtools, watchdog, netaddr, feedparser, futures, future, typing, pyasn1, rsa, sentry-sdk, filetype, pyserial, emoji, blinker, octoprint
Successfully installed Babel-2.8.0 Click-7.1.1 Flask-Assets-0.12 Flask-Babel-0.12.2 Flask-Login-0.4.1 Jinja2-2.8.1 MarkupSafe-1.1.1 PyYAML-5.3.1 Unidecode-0.4.21 argh-0.26.2 awesome-slugify-1.6.5 backports-abc-0.5 blinker-1.4 cachelib-0.1 certifi-2020.4.5.1 chainmap-1.0.3 chardet-3.0.4 emoji-0.5.4 feedparser-5.2.1 filetype-1.0.6 flask-0.12.5 frozendict-1.2 future-0.18.2 futures-3.3.0 idna-2.9 itsdangerous-1.1.0 markdown-3.1.1 monotonic-1.5 netaddr-0.7.19 netifaces-0.10.9 octoprint-1.4.0 pathtools-0.1.2 pkginfo-1.5.0.1 psutil-5.6.7 pyasn1-0.4.8 pylru-1.2.0 pyserial-3.4 pytz-2019.3 regex-2020.4.4 requests-2.23.0 rsa-4.0 sarge-0.1.5.post0 scandir-1.10.0 semantic-version-2.8.4 sentry-sdk-0.13.2 singledispatch-3.4.0.3 six-1.14.0 tornado-4.5.3 typing-3.7.4.1 urllib3-1.25.9 watchdog-0.9.0 webassets-2.0 websocket-client-0.56.0 werkzeug-0.16.1 wrapt-1.11.2
Actualización
OctoPrint debería poder actualizarse automáticamente y también permitirle cambiar a otros canales de lanzamiento de forma inmediata.
Sin embargo, si por alguna razón desea o necesita realizar algo de esto manualmente, ejecute los siguientes comandos para instalar <versión> de OctoPrint:
source ~/OctoPrint/venv/bin/activate
pip install octoprint==<version>
p.ej.
fuente ~ / OctoPrint / venv / bin / enable
pip install octoprint == 1.3.12rc1
Admitir reinicio / apagado a través del menú del sistema de OctoPrint
En Configuración> Comandos, configure los siguientes comandos:
Reinicio de OctoPrint:
sudo service octoprint restart
Reinicio del sistema:
sudo shutdown -r now
Apagado del sistema:
sudo shutdown -h now
Arranque automático
Para que Octoprint arranque automático al iniciar el sistema ,descargue los archivos de script de inicio del repositorio de OctoPrint, muévalos a sus respectivas carpetas y haga que el script de inicio sea ejecutable:
wget https://github.com/foosel/OctoPrint/raw/master/scripts/octoprint.init && sudo mv octoprint.init /etc/init.d/octoprint

wget https://github.com/foosel/OctoPrint/raw/master/scripts/octoprint.default && sudo mv octoprint.default / etc / default / octoprint

sudo chmod + x /etc/init.d/octoprint
Ajuste las rutas a su binario octoprint en / etc / default / octoprint. Si lo configura en un virtualenv como se describe anteriormente, asegúrese de que su / etc / default / octoprint se modifique así:
DAEMON = / home / pi / OctoPrint / venv / bin / octoprint
¡Observe también el # eliminado al comienzo de la línea, descomentándolo y haciéndolo efectivo!
Luego, agregue el script al inicio automático utilizando los valores predeterminados de sudo update-rc.d octoprint.
Esto también le permitirá iniciar / detener / reiniciar el demonio OctoPrint a través de
sudo service octoprint {start|stop|restart}
Puerto 80
Si desea tener una URL más agradable o simplemente necesita que OctoPrint se ejecute en el puerto 80 (puerto predeterminado de http) debido a algunas restricciones de red, se recomienda usar HAProxy 358 como proxy inverso en lugar de configurar OctoPrint para que se ejecute en el puerto 80.
Esto tiene lo siguiente ventajas:
-
- OctoPrint no necesita ejecutarse con privilegios de root, que necesitaría para poder vincularse al puerto 80 gracias a las restricciones de puertos privilegiados de Linux
- También puede hacer que mjpg-streamer sea accesible en el puerto 80
- Puede agregar autenticación a OctoPrint
- Dependiendo de la versión de HAProxy, también puede usar SSL para acceder a OctoPrint
La configuración es la siguiente:
sudo apt install haproxy
Estoy usando la siguiente configuración en /etc/haproxy/haproxy.cfg, para más ejemplos eche un vistazo aquí 864:
option httplog
option dontlognull
retries 3
option redispatch
option http-server-close
option forwardfor
maxconn 2000
timeout connect 5s
timeout client 15min
timeout server 15min

frontend public
bind :::80 v4v6
use_backend webcam if { path_beg /webcam/ }
default_backend octoprint

backend octoprint
reqrep ^([^\ :]*)\ /(.*) \1\ /\2
option forwardfor
server octoprint1 127.0.0.1:5000

backend webcam
reqrep ^([^\ :]*)\ /webcam/(.*) \1\ /\2
server webcam1 127.0.0.1:8080
Esto hará que OctoPrint sea accesible en http: // <IP > / y hará que mjpg-streamer sea accesible en http: // <IP > / webcam /.
También deberá modificar / etc / default / haproxy y habilitar HAProxy estableciendo ENABLED en 1. Después de eso, puede iniciar HAProxy emitiendo el siguiente comando
sudo service haproxy start
Señalar su navegador a http: // <la IP > debería saludarlo con la interfaz de usuario de OctoPrint. Ahora abra la configuración y cambie a la pestaña de la cámara web o, alternativamente, abra ~ / .octoprint / config.yaml. Establezca la URL de transmisión de la cámara web desde http: // <IP >: 8080 /? Action = stream a / webcam /? Action = stream (deje la instantánea en http://127.0.0.1:8080/?action=snapshot! ) y vuelva a cargar la página.
Si todo funciona, puede agregar las siguientes líneas a ~ / .octoprint / config.yaml (solo créelo si aún no existe) para que el servidor se vincule solo a la interfaz de lopback
server:

host: 127.0.0.1
Reinicie el servidor. OctoPrint aún debería estar disponible en el puerto 80, incluida la alimentación de la cámara web (si está habilitada)
Soporte de webcam
Si también desea soporte para cámara web y timelapse, deberá descargar y compilar MJPG-Streamer:
cd ~
sudo apt install subversion libjpeg62-turbo-dev imagemagick ffmpeg libv4l-dev cmake
git clone https://github.com/jacksonliam/mjpg-streamer.git
cd mjpg-streamer/mjpg-streamer-experimental
export LD_LIBRARY_PATH=.
make
Los paquetes requeridos dependen de la versión subyacente de Debian! Lo anterior es lo que debería funcionar en las imágenes actuales
Con suerte, esto debería ejecutarse sin ningún error de compilación. Entonces debería poder iniciar el servidor de la cámara web usando:
./mjpg_streamer -i "./input_uvc.so" -o "./output_http.so"
Esto debería dar el siguiente resultado:
MJPG Streamer Version: svn rev:
i: Using V4L2 device.: /dev/video0
i: Desired Resolution: 640 x 480
i: Frames Per Second.: 5
i: Format............: MJPEG
[...]
o: www-folder-path...: disabled
o: HTTP TCP port.....: 8080
o: username:password.: disabled
o: commands..........: enabled
Para algunas cámaras web (incluida la PS3 Eye), deberá forzar el modo YUV mediante el siguiente comando de inicio:
./mjpg_streamer -i "./input_uvc.so -y" -o "./output_http.so"
Tenga en cuenta que el modo YUV ejercerá tensión adicional en la CPU de su PC , lo que reducirá su rendimiento, posiblemente hasta el punto de causar problemas de impresión. Si su cámara requiere el parámetro -y para funcionar, considere reemplazarlo por uno que no lo haga.
Ahora apunte en su navegador a
http: // : 8080 /? action = stream,
, por lo debería ver una imagen en movimiento a 5 fps. (Si recibe un mensaje de error sobre los archivos o directorios faltantes, debería ayudar al complemento de salida con -o «./output_http.so -w ./www»).
Abra el cuadro de diálogo de configuración de OctoPrint y en Webcam & Timelapse configuró lo siguiente:
-
- Stream URL:
/webcam/?action=stream - Snapshot URL:
http://127.0.0.1:8080/?action=snapshot - Path to FFMPEG:
/usr/bin/ffmpeg
- Stream URL:
Reinicie el servidor OctoPrint, borre el caché en su navegador y vuelva a cargar la página OctoPrint. Ahora debería ver la transmisión desde la cámara web en la pestaña «Control» y una pestaña «Timelapse» con opciones.
Si desea poder iniciar y detener mjpeg-streamer desde OctoPrint, coloque lo siguiente en / home /XXXX / scripts / webcam:
#!/bin/bash
# Start / stop streamer daemon

case "$1" in
start)
/home/pi/scripts/webcamDaemon >/dev/null 2>&1 &
echo "$0: started"
;;
stop)
pkill -x webcamDaemon
pkill -x mjpg_streamer
echo "$0: stopped"
;;
*)
echo "Usage: $0 {start|stop}" >&2
;;
esac
Ponga esto en /home/XXXX/scripts/webcamDaemon:
#!/bin/bash

MJPGSTREAMER_HOME=/home/pi/mjpg-streamer/mjpg-streamer-experimental
MJPGSTREAMER_INPUT_USB="input_uvc.so"
MJPGSTREAMER_INPUT_RASPICAM="input_raspicam.so"

# init configuration
camera="auto"
camera_usb_options="-r 640x480 -f 10"
camera_raspi_options="-fps 10"

if [ -e "/boot/octopi.txt" ]; then
    source "/boot/octopi.txt"
fi

# runs MJPG Streamer, using the provided input plugin + configuration
function runMjpgStreamer {
    input=$1
    pushd $MJPGSTREAMER_HOME
    echo Running ./mjpg_streamer -o "output_http.so -w ./www" -i "$input"
    LD_LIBRARY_PATH=. ./mjpg_streamer -o "output_http.so -w ./www" -i "$input"
    popd
}

# starts up the RasPiCam
function startRaspi {
    logger "Starting Raspberry Pi camera"
    runMjpgStreamer "$MJPGSTREAMER_INPUT_RASPICAM $camera_raspi_options"
}

# starts up the USB webcam
function startUsb {
    logger "Starting USB webcam"
    runMjpgStreamer "$MJPGSTREAMER_INPUT_USB $camera_usb_options"
}

# we need this to prevent the later calls to vcgencmd from blocking
# I have no idea why, but that's how it is...
vcgencmd version

# echo configuration
echo camera: $camera
echo usb options: $camera_usb_options
echo raspi options: $camera_raspi_options

# keep mjpg streamer running if some camera is attached
while true; do
    if [ -e "/dev/video0" ] && { [ "$camera" = "auto" ] || [ "$camera" = "usb" ] ; }; then
        startUsb
    elif [ "`vcgencmd get_camera`" = "supported=1 detected=1" ] && { [ "$camera" = "auto" ] || [ "$camera" = "raspi" ] ; }; then
        startRaspi
    fi

    sleep 120
done
Asegúrese de que ambos archivos sean ejecutables:
chmod + x / home / XXX / scripts / webcam
chmod + x / home / XXXX / scripts / webcamDaemon
Si desea diferentes opciones de cámara, colóquelas en /boot/octopi.txt o modifique el script en consecuencia.
Si desea el inicio automático de la cámara web, debe agregar la siguiente línea a /etc/rc.local (solo asegúrese de colocarla sobre la línea que dice la salida 0).
/ inicio / pi / scripts / webcam start
Si desea iniciar y detener el servidor de la cámara web a través del menú del sistema de OctoPrint, agregue lo siguiente a config.yaml:
system:
actions:
- action: streamon
command: /home/pi/scripts/webcam start
confirm: false
name: Start video stream
- action: streamoff
command: sudo /home/pi/scripts/webcam stop
confirm: false
name: Stop video stream
Mas información aqui

Debe estar conectado para enviar un comentario.